With regards to various bird species, there are such countless bizarre and awesome various types to notice. Everyone has its own appearance, sounds and size, and seeing exactly the way that different everyone is can very intrigue.
Note: After learning this tutorial visit more Cool Drawing Ideas.
The turkey is one of the most uncommon bird species out there, and that is saying something! This can make it all the while fun and testing to figure out how to draw an cartoon turkey.
That is the very thing that this guide is hanging around for, nonetheless, as we mean to show you how you can without much of a stretch figure out how to draw a great depiction of this strange bird. So prepare to make a great bird companion in this bit by bit guide on the most proficient method to attract an cartoon turkey only 6 simple tasks!
We will start this cartoon turkey drawing with the head and face, and we have a truly fun, odd look for this pleasant turkey plan! You can begin the face by drawing a straightforward oval shape for the principal eye. This will then have a bended line connected to it for the other eye. We will then, at that point, add a dark spot inside each eye for the students.
Then, we will draw the nose of the turkey. This will be drawn utilizing a few bended lines with a couple sharp tips for regions like the tip of the nose. The mouth will be completely open and shaded in dark with the exception of the tongue at the lower part of the mouth. At long last, polish off by drawing the remainder of the head frame around the eyes for certain more adjusted lines, and afterward we can continue on.
In this second step of our aide on the most proficient method to draw a cartoon turkey, we will add the neck and wings for this odd person! We will start with the neck to make things simpler. To start with, define two boundaries descending from the foundation of the nose.
These lines will spread out into a few bended padded segments as we show in the reference picture. The wings will then join straightforwardly to this neck segment. They will likewise be drawn with bended and adjusted lines, and they will be comprised of three enormous quills. Each quill will get a piece more modest the lower down you get too. Then, at that point, we can continue on toward stage 3!
Going on with this aide, we will currently add the remainder of the body frame. This plan has a pudgy, adjusted body, and hence we will involve a few huge adjusted lines for this framework. These lines won't be strong, nonetheless, as there will be two segments jabbing out at the foundation of the body.
These will have some sharp bended segments jabbing off of them, and these are where the legs will jab out later. Polish off with some more sharp lines on the chest, and afterward we can continue on!
One of the most unmistakable pieces of a turkey's appearance would need to be its enormous tail, and we will add that alongside the feet to your cartoon turkey drawing now. We will begin with the legs. These will be very short and slender, and they will jab out from those areas that we added to the foundation of the body prior.
The feet will be genuinely lengthy and level with adjusted toes. The tail will be comprised of many huge plumes with balanced closes that fan behind the turkey. When these components have been added, we can continue on toward a few last subtleties!
Presently you're prepared to add the last little subtleties and components to this cartoon turkey drawing as we plan for the last step of the aide. These subtleties are basic, however they will be powerful with polishing off this great portrayal. We added a few straight lines across the plumes close to the adjusted tips and afterward added a few lines onto the feet and around the quills to show movement.
These are the subtleties that we decided for this turkey, however you could likewise add a lot your very own greater amount! These could remember more modest subtleties for the turkey, yet they could likewise incorporate making a tomfoolery foundation setting for this turkey to be in. What sorts of extra contacts might you at any point remember to add to this inventive turkey?
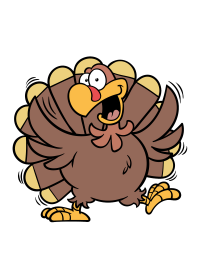
In this last step of our aide on the best way to draw an cartoon turkey, we will polish off for certain varieties. In our reference picture, we went with different shades of browns for the quills and afterward involved a few gentle yellows for the tips of the plumes.
We additionally involved a few oranges and reds for various more modest subtleties like the nose and legs. You could likewise involve comparative tones for your own drawing, however this is your opportunity to truly allow your innovativeness to stream too!
At the point when you realize which colors you will utilize, you can likewise mess around with the different craftsmanship devices and mediums that you decide to assist you with accomplishing the sorts of varieties you're searching for.